Indexing MySQL with SOLR in Docker
I think Docker is a great concept, being able to wrap up your software with just the tools and resources needed to run, and the being able to deploy anywhere. If you haven’t looked at Docker checkout the quick start guide.
I haven’t played much with Docker but last week I had to workout how to index a MySQL database with SOLR both applications where hosted in two Docker containers.
I first started trying to set things up using Windows but I wasn’t able to use the Docker cp command to copy files into containers. I spun up a Debian VM and followed these setup instructions to install Docker.
I haven’t used SOLR before that was my first task, learn SOLR and how it use it. I installed the official SOLR container and started working my way through the quick start guide.
If you are new to MySQL the official Docker container can be found here, and info on the MySQL command line reference here.
After playing and poking Docker, SOLR and MySQL for a few days these are the steps to setup two container, link them and index the data in the MySQL container.
Create a Network
The Docker networking guide can be found here. Run the following command to create a network called solr_mysql
$ docker network create -d bridge solr_mysql
Create a MySQL container
The MySQL Docker Hub Repository is here. To add the container to the network we created above we need to add the --net flag to the command.
$ docker run --name mysql_db --net=solr_mysql -e MYSQL_ROOT_PASSWORD=P@55w0rd -d mysql:latest
The command also gives our container a name mysql_db, sets the database password and selects the latest available version of the MySQL image.
Create a Database and Insert Database
I wanted a small demo data set to play with, I found a script here. I renamed the database in the script to solr-demo. Copy the script to the container using the docker cp command.
$ docker cp Document/mysqlsampledatabase.sql mysql_db:home/
To execute the sql script we will need to login to the MySQL cli. You will need to enter the password you setup after running the next command.
$ docker exec -it mysql_db mysql -u root -p
To run the script.
mysql> source /home/mysqlsampledatabase.sql
You can see the tables the script created by running,
mysql> show tables;
Create a SOLR Container
The SOLR Docker Hub Repository can be found here.
Solr has an admin portal, to access the portal with a browser we will need to expose it to the host system using the -p flag.
$ docker run --name solr_idx --net=solr_mysql -d -p 8983:8983 -t solr
Once the container is running, if you navigate to http://0.0.0.0:8983 you should see the admin portal running.

Now we have two containers running we can see if the have been attached to the solr_mysql network, by running the network inspect command.
$ docker network inspect solr_mysql
You should see something like this.
[{
  "name": "solr_mysql",
  "id": "7fca4eb8c647e57e9d46c32714271e0c3f8bf8d17d346629e2820547b2d90039",
  "scope": "local",
  "driver": "bridge",
  "IPAM": {
    "driver": "default",
    "config": [
        {}
    ]
  },
  "containers": {
      "bda12f8922785d1f160be70736f26c1e331ab8aaf8ed8d56728508f2e2fd4727": {
          "endpoint": "e0ac95934f803d7e36384a2029b8d1eeb56cb88727aa2e8b7edfeebaa6dfd758",
          "mac_address": "02:42:ac:11:00:03",
          "ipv4_address": "172.18.0.3/16",
          "ipv6_address": ""
      },
      "f2870c98fd504370fb86e59f32cd0753b1ac9b69b7d80566ffc7192a82b3ed27": {
          "endpoint": "31de280881d2a774345bbfb1594159ade4ae4024ebfb1320cb74a30225f6a8ae",
          "mac_address": "02:42:ac:11:00:02",
          "ipv4_address": "172.18.0.2/16",
          "ipv6_address": ""
      }
  },
  "options": {}
}]
Configuring SOLR
Before we an configure SOLR we need to create a core to configure. We can use the docker exec command to run SOLR commands in our container.
$ docker exec -it solr_idx bin/solr create_core -c mysql_db
Everything we have done so far has been straight forward. The next few steps I had issues, hopefully now you won’t.
We need to setup a Data Import Handler so we can index the data in our MySQL database.
Create an xml file I called mine db-data-config.xml. The file file will contain information on how to connect to our db and how to extract the data we want to index.
<dataConfig>
  <dataSource type="JdbcDataSource" driver="com.mysql.jdbc.Driver" url="jdbc:mysql://172.18.0.2:3306/solr-demo" user="root" password="P@55w0rd" batchSize="1" />
  <document name="customers">
    <entity name="customer" query="SELECT * FROM customers">
      <field column="customerNumber" name="id" />
      <field column="customerName" name="name" />
      <field column="city" name="city" />
      <field column="country" name="country" />
      <entity name="customer" query="SELECT * FROM employees where employeeNumber='${customer.salesRepEmployeeNumber}'">
        <field column="employeeNumber" name="employeeNumber" />
        <field column="firstName" name="firstName" />
        <field column="lastName" name="lastName" />
        <field column="email" name="email" />
      </entity>
    </entity>
  </document>
</dataConfig>
In the above example you can see where our database is running and I am going to index only the customer data, but we can search on some of the fields from the customer and a few fields from the employees table. This config can be copied to the config folder for our mysql_db core.
$ docker cp Document/db-data-config.xml solr_idx:/opt/solr/server/solr/mysql_db/conf
Before we can do the final step, we need to drop the mysql jdbc driver into our container. The driver can be found here. Copy the jar file into the solr container, I copied it to the data import handler extras folder.
$ docker cp Downloads/mysql-connector-java-5.1.37/mysql-connector-java-5.1.37-bin.jar solr_idx:/opt/solr/contrib/dataimporthandler-extras/lib
Now to let SOLR know of the data import handler we have created.
You can download the default config file from the admin portal by, selecting your core from the dropdown on the left. Selecting files from the menu the clicking on the solrconfig.xml link, across the top of the screen is a link you can use to save the file.
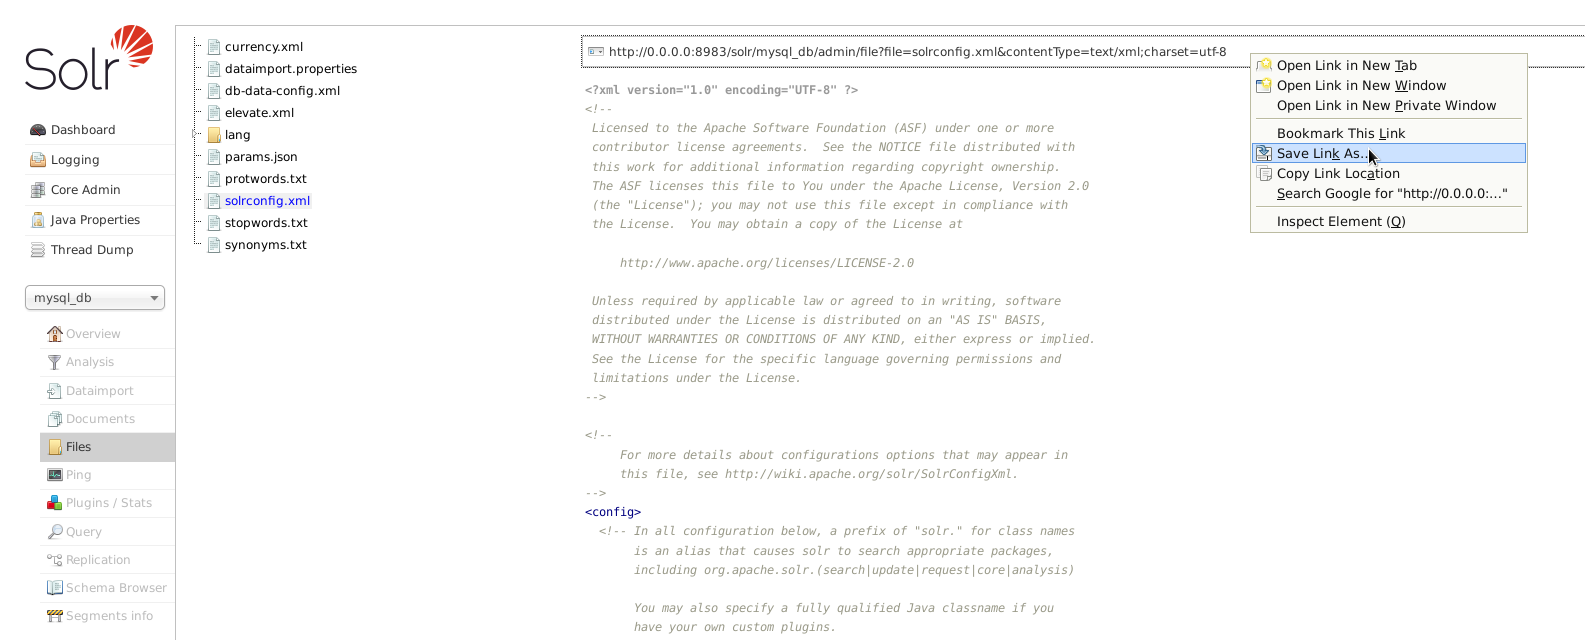
We will have to update this file to import the MySQL driver and the data import handler library.
<lib dir="${solr.install.dir:../../../..}/dist/" regex="solr-dataimporthandler-.*\.jar" />
<lib dir="${solr.install.dir:../../../..}/contrib/dataimporthandler-extras/lib/" regex="mysql-connector-java-.*-bin\.jar" />
Add these two lines just below the <luceneMatchVersion>5.3.1</luceneMatchVersion> line. If you saved the MySQL driver in a different place, you will have to update the 2nd line to point to were you saved it.
<requestHandler name="/dataimport" class="org.apache.solr.handler.dataimport.DataImportHandler">
  <lst name="defaults">
    <str name="config">db-data-config.xml</str>
  </lst>
</requestHandler>
This block tells SOLR where to find our db-data-config.xml file. About half way down the solrconfig.xml you will start seeing other requestHandler tags. Add your data import request handler before or after one of the others. Now copy over the existing solrconfig.xml file.
$ docker cp Document/solrconfig.xml solr_idx:/opt/solr/server/solr/mysql_db/conf
I restarted my container at this point just make sure the new configs were loaded. Once your container come back up head over to the admin portal. If everything has loaded you should see the following if you select Dataimport from the menu.
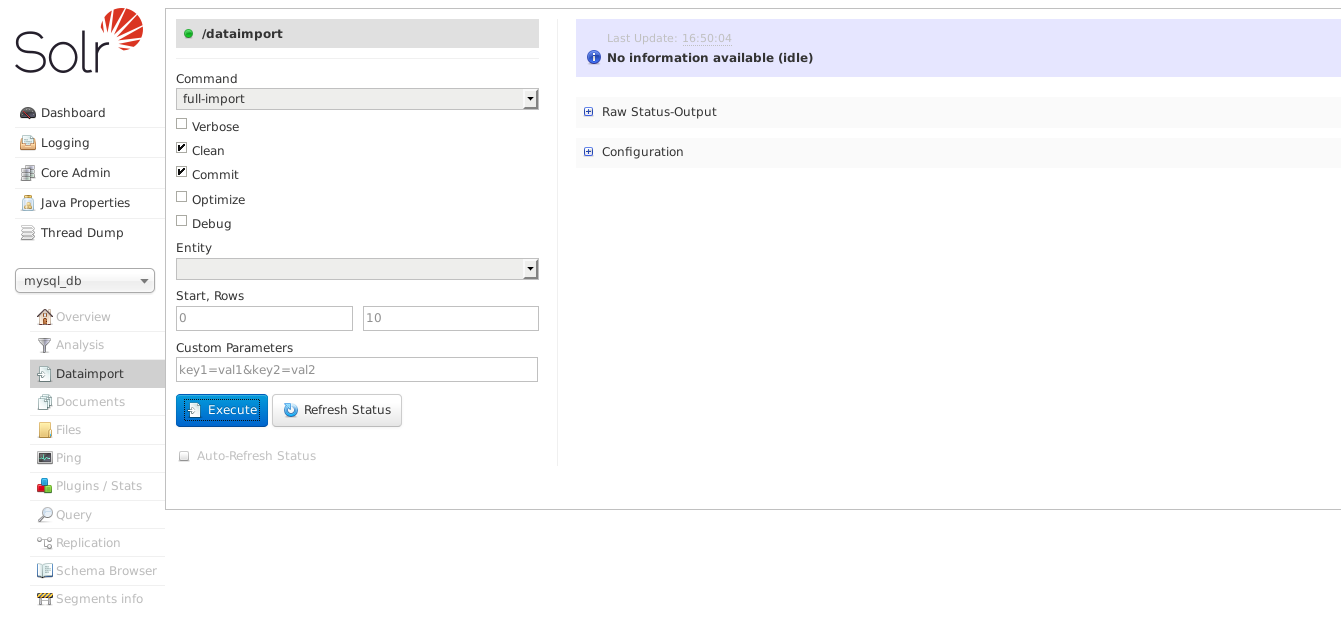
Selecting customer from the Entity drop down and clicking execute will import and index our data.
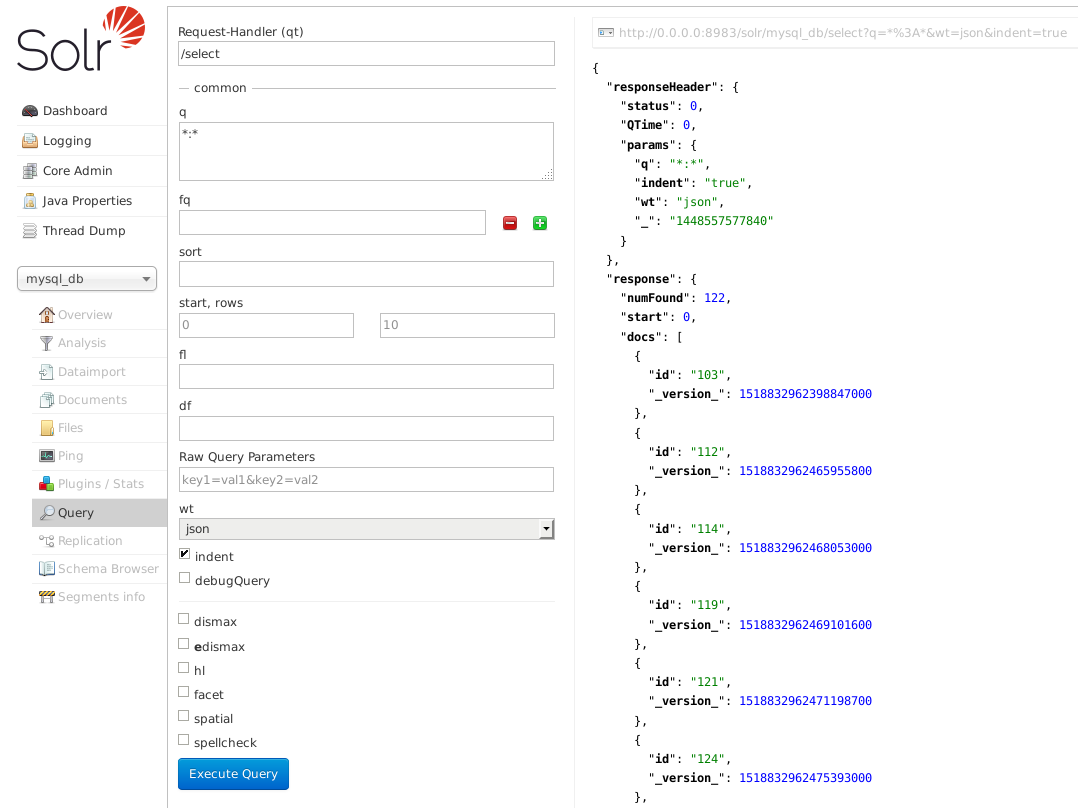
Above I have just executed the default *:* query, which will return the first 10 results and how many entities there are, 122 in the above example.
Hopefully you can expand on these instructions to fit your own scenario. This was a good deep dive into Docker and I have picked up a few things about SOLR along the way.